RealSense learning/turtorial/sharing blog - Chapter One:The Start, Install and Hello World
It's been one month I’ve been working on this Intel realsense D435, and still I’m not so sure with a lot of functions and some parameters. Like when to add () and when not, which function need which
parameter to fit in. First I read the
https://buildmedia.readthedocs.org/media/pdf/pyrealsense/dev/pyrealsense.pdf
And the python.cpp in the python wrapper to find the options Actually it didn't help much, mainly I started with the examples in python wrapper and then read the corresponding codes in the C++ example. It is also because this project is to measure objects in the picture, and in the example there is already one measuring in stream, so translating that code is the first approach. And here
https://pyrealsense.readthedocs.io/en/master/index.html
The starting part of the camera:
With the Intel Realsense Viewer we can get all the possible control options
the picture of IR/Depth/RGB stream

For RGB the highest resolution can be up to 1920*1080
auto exposure sometimes is turned off to reduce frame drop


In my measuring usage I will be using the High density to get the most pixels covered
while determine movement or object can use high accuracy
and the presets can be also set manually


one important feature for me is the hole filling, to get the most of the measurements this algorithm is a way to fill the frame
before

after

it can already record and choose the save directory

the view also come in 3D, for the usage of point cloud

least but not the last, the depth viewer, currently I havent been using it, since its like the viewer without the color stream control.

Setting of the environment
Pip install pyrealsense2
This is the current easiest way to install it, while the other method is through CMake which I never tested

Other plugins needed will be: numpy, opencv-python, matplotlib
Also can be done with pip install
------------------------------------------------------------------------------------------------------------------------
So start scripting:
My first example is to rewrite the Hello World into python
https://github.com/soarwing52/RealsensePython/blob/master/phase%201/Hello%20World.py
Import pyrealsense2 as rs
This is the library import line for realsense, in all further scripts it will be all in this form
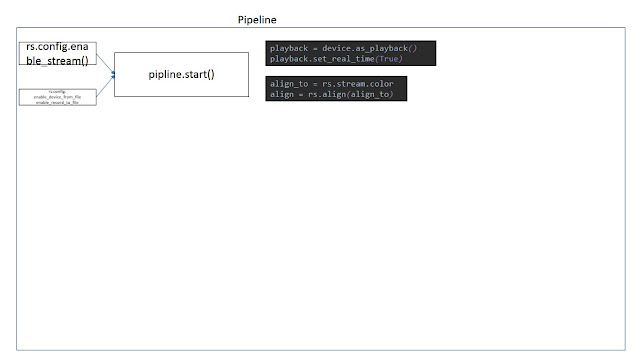
The pipeline:
For video processing all the instructions are in a pipeline, so start it and combine the next moves.
Pipeline = rs.pipeline()
pipeline.start()
And then the configurations of the pipeline:
config = rs.config()
config.enable_stream()
This sets up streams of frames which not only when using camera but also when reading from bag files, mainly I use for alignment of frames, other I still haven’t found the function for it
Parameters:
(stream type,resolution, image format, fps)
Example:
config.enable_stream(rs.stream.depth, 640, 360, rs.format.z16, 30)
config.enable_stream(rs.stream.color, 640, 480, rs.format.bgr8, 30)
The possible can be found in the Intel Realsense Viewer, color,depth,infrared.
One thing I found interesting is that when it in default is the bgr format
in Intel Viewer it shows bgr in rgb, which means where red is blue and the colors are not correct to human eye.
So when I record as rgb8/rgba8, and view in opencv-python, it shows also again wrong, shows rgb in bgr format.
and when I use matplotlib, it showed rgb as default view.
so I need to add one cv2.convert if I want to show RGB image correctly in opencv window.
It is not a big problem just one interesting phenomenon
https://www.learnopencv.com/why-does-opencv-use-bgr-color-format/


RGB/Y16/BGR
In order to get the frames one after one, perform as a stream/video, a try and a while loop is required
Try:
while True:
Except Runtimeerror:
No frames came or ended
Finally:
pipeline.stop()
So for getting the frames
frame = pipeline.wait_for_frames()
depth_frame = frame.get_depth_frame()
color_frame = frame.get_color_frame()
This is quite straightforward
The get frame options for pipeline are:
poll_for_frames()
Get frames immediately
Somehow I can’t make it work, it just always reply no frames coming until the end
wait_for_frames()
It will block the stream until the next stream came, this caused a matching problem which I will describe later when I tested measuring
try_wait_for_frames
I haven't really get to know this one yet
This is also same options for the syncer, but as I wrote before, I can’t get the syncer to function yet.
For frame queue there are more options
rs.frame_queue()
This will put the frames first in memory and then process and save, if there's a lot of frames while streaming, this is the method to prevent drop frames since it saves the frame data first.
In this project I didn’t need this function, just came across it while searching
So back to the Hello World sample.
width = depth_frame.get_width()
height = depth_frame.get_height()
dist = depth_frame.get_distance(width / 2, height / 2)
This is getting attribute from frames
The options are
get_width
get_height
get_stride_in_bytes
get_bits_per_pixel
get_bytes_per_pixel
And for the metadata of the frames:
var = rs.frame.get_frame_number(color_frame)
print 'frame number: '+ str(var)
time_stamp = rs.frame.get_timestamp(color_frame)
time = datetime.now()
print 'timestamp: ' + str(time_stamp)
domain = rs.frame.get_frame_timestamp_domain(color_frame)
print domain
meta = rs.frame.get_data(color_frame)
print 'metadata: ' + str(meta)
Frame number, timestamp are the ones I used, others I haven't get my hands on yet
The get_distance is only for depth_frames while the others apply to all other frames.
So this can get the basic distance. But for accuracy, even though it shows the number up to 76,
The detecting distance of D435 is 10 meters, and for my test, it's accurate within 5-6m up to +-10cm on measuring objects
key = cv2.waitKey(1)
This is window controlling, with 1 means 1ms the window will show, and 0 means forever
if key & 0xFF == ord('q') or key == 27:
Break
This means when esc/q is pressed, exit the while loop, and proceed to next frame because there is a try outside of the while loop.


Comments
Post a Comment