RealSense learning/turtorial/sharing blog - Chapter Three: Frame control
In the last post we finished the adjustments of the camera
This part will work on the frames. getting the frames is the first step of the data
Explaining the content of the frame class and its instinces
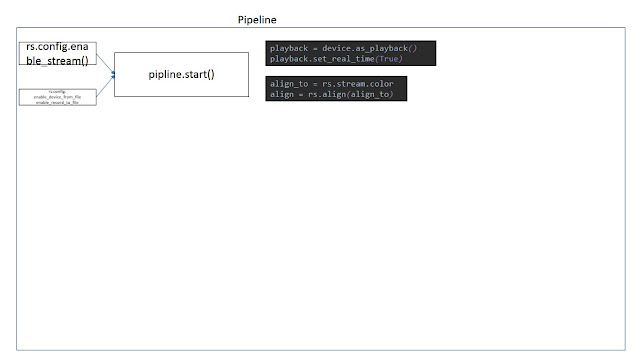
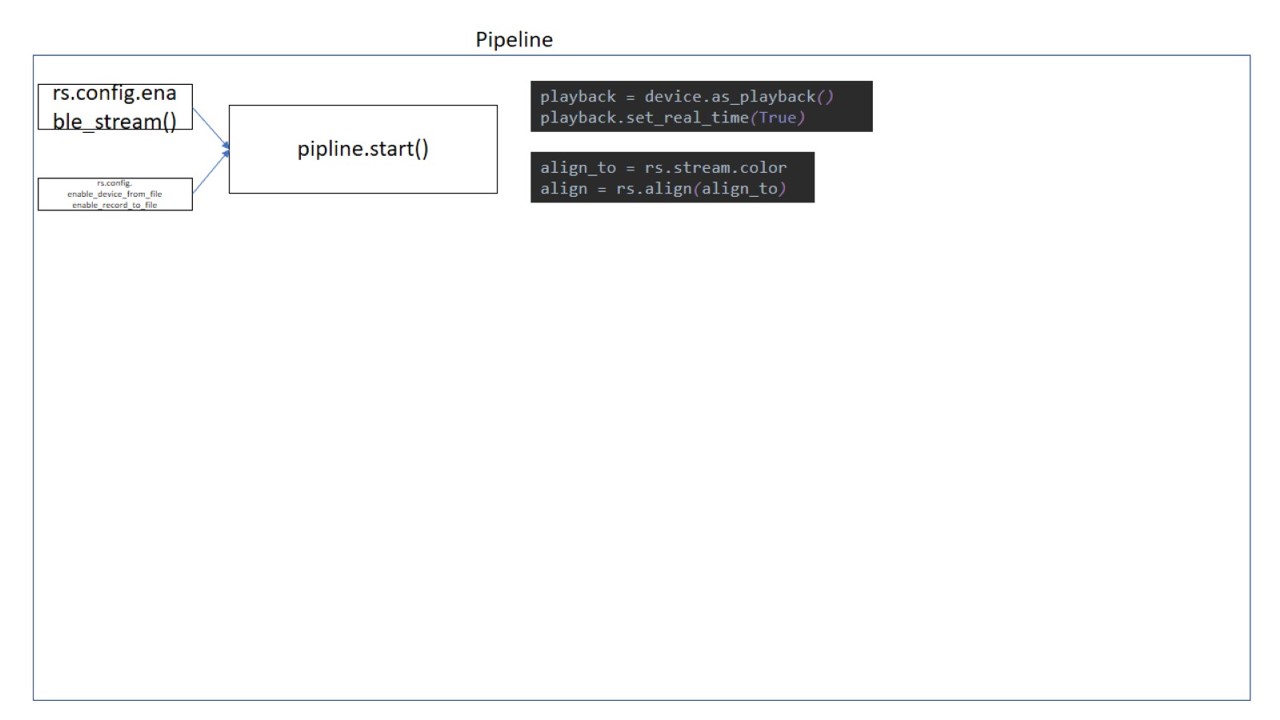
The start is with setting up a pipeline

frames = pipeline.wait_for_frames() #wait until the next frame is ready
frames = pipeline.poll_for_frames() #get immediately a frame
These possibilities, we got a frame, what next?


The code of the options in the Viewer can be used in the code like this:
the structure is define a filter, and then process the frame
This part will work on the frames. getting the frames is the first step of the data
Explaining the content of the frame class and its instinces
The start is with setting up a pipeline
frames = pipeline.wait_for_frames() #wait until the next frame is ready
frames = pipeline.poll_for_frames() #get immediately a frame
These possibilities, we got a frame, what next?
The first thing would be align the two
streams, because the depth and RGB camera have slightly difference on their
view, depth is slightly bigger
And why not align it automatically? As
dordinic answered in one issue, when 3D processing point cloud would be more
color align to depth, while like in my case image comparison is using depth
align to color, so the user can decide

align_to = rs.stream.color # or also depth
align = rs.align(align_to)
aligned_frames = align.process(frames)
This is the code to simply align them, just
need to enable stream at the configuration
So after the frame got, now separate them
depth_frame = frame.get_depth_frame()
color_frame = frame.get_color_frame()
first_or_default
|
|
first
|
|
size
|
|
foreach
|
|
__getitem__
|
|
get_depth_frame
|
I only used these two so far
|
get_color_frame
|
|
get_infrared_frame
|
|
get_pose_frame
|
|
__iter__
|
"Size" "__getitem__"
|
So within the pipeline started the try with while loop will work for continuous streaming

Filters
So in the viewer the postprocessing can applie
filters, also in here we need it, and for measuring, most important is the hole
filling filter for me

dec = rs.decimation_filter(1) # define a filter
to_dasparity = rs.disparity_transform(True)
dasparity_to = rs.disparity_transform(False)
spat = rs.spatial_filter()
spat.set_option(RS2_OPTION_HOLES_FILL, 5)
hole = rs.hole_filling_filter(2)
temp = rs.temporal_filter()
depth = dec.process(depth_frame) #process the frame
depth_dis = to_dasparity.process(depth)
depth_spat = spat.process(depth_dis)
depth_temp = temp.process(depth_spat)
depth_hole = hole.process(depth_temp)
depth_final = dasparity_to.process(depth_hole)
I translated the process in the rs.measure
example
The hole processing is actually done under the
spatial filter
Visualization
So after the basic data is ready the
preparation for visualizing will first colorize the depth frame
depth_color_frame =
rs.colorizer().colorize(depth_frame)
The color scheme can be also decided in the
option of colorizer
depth_color_image = np.asanyarray(depth_color_frame.get_data())
color_image =
np.asanyarray(color_frame.get_data())
Then is turn the frames into numpy arrays


OpenCV visualization
color_cvt =
cv2.cvtColor(color_image,cv2.COLOR_RGB2BGR)
#convert color to correct
cv2.namedWindow("Color Stream",
cv2.WINDOW_AUTOSIZE)
cv2.imshow("Color
Stream",color_image)
cv2.imshow("Depth Stream",
depth_color_image)
key = cv2.waitKey(1)
# if pressed escape exit program
if key == 27:
cv2.destroyAllWindows()
Break
As I mentioned before, opencv has BGR as
defualt, so RGB must be first transformed to BGR to get the right color
With matplotlib it is also easy,
from matplotlib import pyplot as plt
plt.imshow(img_over)
plt.show()
And it is done


Until here is the basic get frames and
visualize, the basis of all future use and application.


Comments
Post a Comment